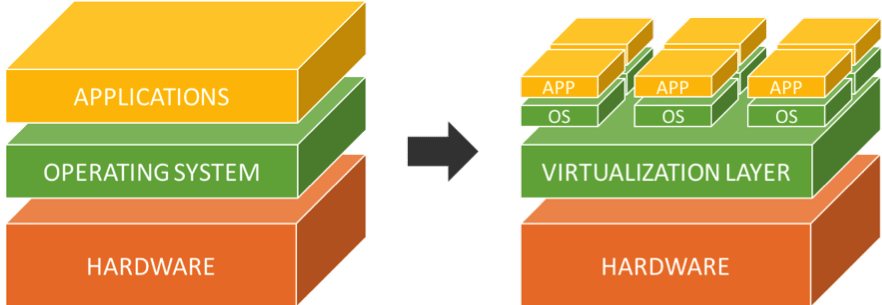
For those who are new to hacking, it is really important to dirty your hands on several types of operating systems but do we need to have different devices in order to run several OS? The answer is NO. You can easily manage more than one operating in a single device based on your configurations like RAM, Storage, Network, etc with the help of virtualization software such as VirtualBox, Vmware, Parallels (MAC) etc.. Virtualization is the process of running a virtual instance of a computer system in a layer abstracted from the actual hardware. In simple words,it refers to running multiple OS on a single device simultaneously. Virtualization allows you to use your device efficiently. Your host system needs a fraction of memory and storage to work properly. In order to utilize the resources properly, virtualization technology is quite heplful. Let us see how we can do this!
PREREQUISITES:
- Make sure you have installed any of the above mentioned virtualization software according to the architecture of your system. Here I am using Virtual Box .You can download virtual box from the official site https://www.virtualbox.org/wiki/Downloads.
- Make sure you have the iso image of the required operating system . An ISO image is the disk image of an optical disc. Here,It is a compressed image file of the same operating system that is written on a disc. These .iso files are easily available on the internet. Here, I’m using .iso file of Windows 7.
- Make sure you have enough memory and storage in your system (16 GB RAM and 1TB hard disk recommended).
HOW TO DO IT?
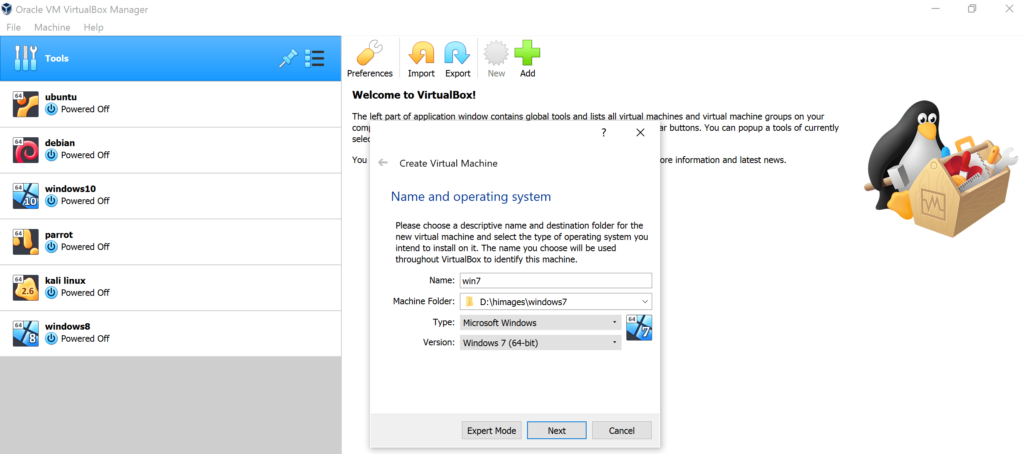
- Open your installed virtual box. Click on new button, a dialog box appears in front of you.
- Name the Virtual machine you are installing. It will automatically configure the below fields.
- Next you have to choose the Machine Folder. It’s a folder where all the files of your virtual machine will be installed. It is similar to that of C:\ drive for your operating system where all the required systems files are installed. By default virtual Box makes the machine folder in the C:\ drive but it is suggested that you should make that machine folder in the other partition of your hard disk because it is better not to touch your system files and if by chance your virtual file got corrupted then it will not affect your windows file. We are making a separate folder in D:\ drive.

- Give this path in your Virtual Box Machine folder in order.
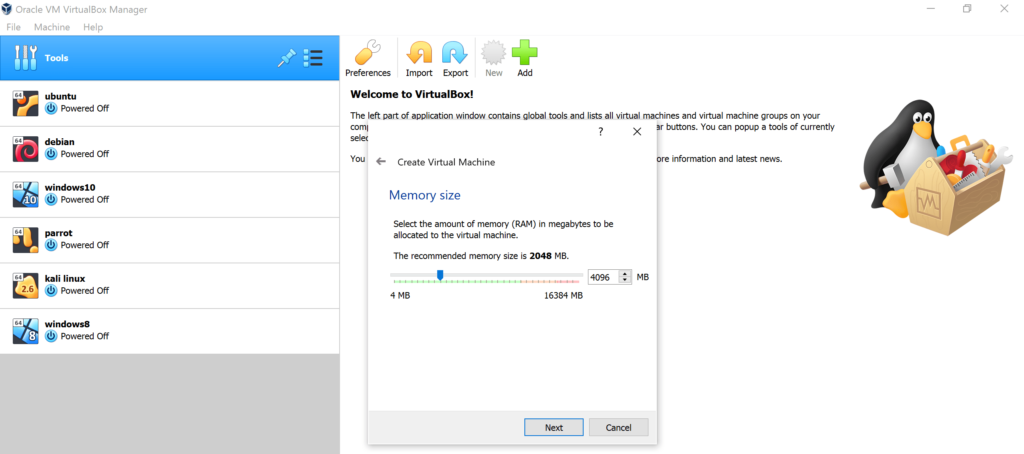
- Next it will ask for the memory size to be given to the virtual machine. It is advised that initially the memory size should be greater in order to make the whole process faster. We will initially assign 4GB RAM to the virtual system.
Next it will ask you to choose how do you want to allocate hard disk size for your virtual machine. We will go with the option Create a virtual hard disk now.

- In the next phase choose the option Virtual Box Disk Image as the iso file you downloaded is an image file and it will create a hard disk file with the extension name .vdi. Then choose Dynamically Allocated as we want to choose the disk at the run time.
- In the final option, allocate your storage size. 25-40GB recommended.
You have created a virtual guest machine inside your host system in which you have allocated the RAM and hard disk storage. Now just as you insert DVD to install windows, we will use .iso image to install the OS. Just as we need drivers to interact with the hardware, this Virtualization does all the job itself to interact with the hardware and use the computer resources.
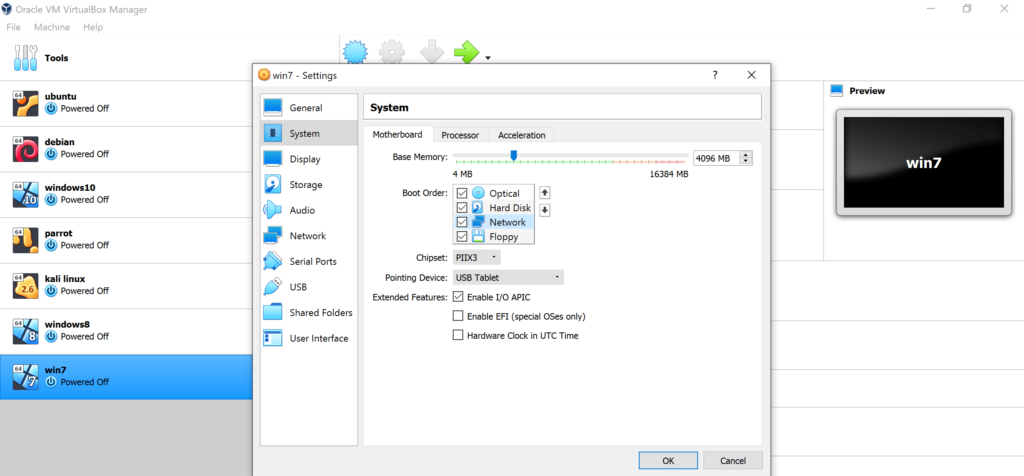
- After doing all the above steps. Go to Settings for that virtual machine you just created.
- Next move on to the System>Boot Order. Next change the Boot Order to Optical Disk->Hard Disk->Network->Floppy as you need to install through virtual image and for that optical disk should be at the top.
- Then go to Storage you will see that disk is empty there. Choose the hard disk file you just installed and check the option Live CD/DVD.
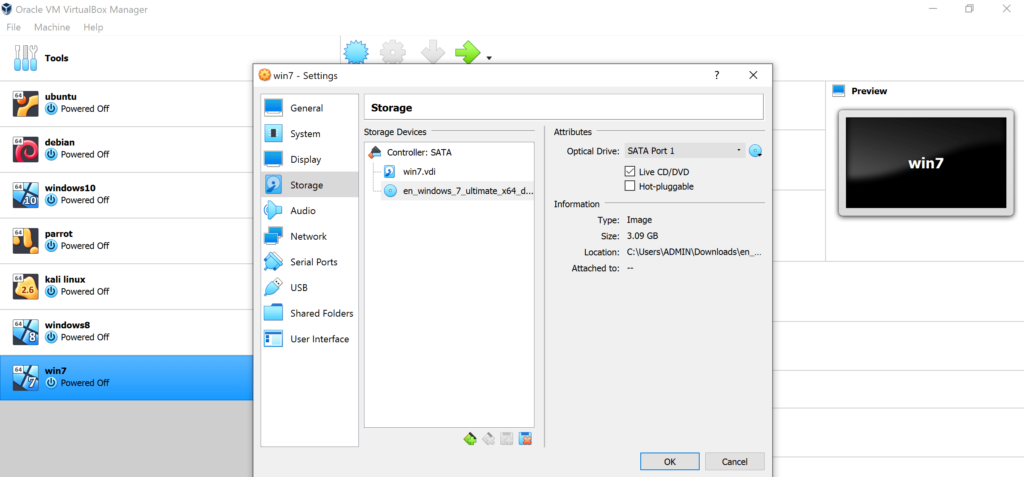
CAUTION: Make sure to remove the iso file after the OS has been installed.
- Then go to Networks. Here you will have the two options if you want your guest virtual machine connect to the internet i.e either you can choose Bridge Adapter or Network Address Translation (NAT) mode. In Bridge Mode, the guest and virtual machine are in the same private IP address pool as it seems that the virtual machine and the host machine are connected to each other with an ethernet cable. There will be a bridge created between your host machine and guest machine so that they are connected to each other. On the other hand, the NAT mode is used to remap you private IP address to public IP. In this mode, your machine will be assigned the address form another pool of private IPs as a virtual router is being placed between you and your host machine. It is recommended to choose Bridge Mode if you don’t want to do any port forwarding.
Now the virtual machine we created is configured. You can turn on the machine and install the operating system in the same way you do on the host machine.You can reduce the allocated RAM once installation is complete.
Proceeding similarly, multiple Operating Systems can be used simultaneously .