Apart from being the 10th version of “MICROSOFT WINDOWS”, being user friendly and having better GUI as compared to its previous versions ,WINDOWS 10 is considered to be the slowest version of Microsoft Windows.
There are many reasons behind this . It may
- not be compatible with your laptop ( hardware requirements such as RAM , processor , hard disk may not be met properly) .
- be simultaneously running many tasks in the background that you may not know .
- be automatically updating its services or applications in the background .
- have corrupted windows file in it .
Due to these factors, professionals do not recommend to use Windows 10 as your OS .
But ,of course it has one of the best GUI thus making it most popular .
So , Let us discover how can we speed up our Windows 10!
Obviously we can not alter the first factor i.e hardware requirements but we can try our best to solve the other factors by changing some of the policies , settings in the windows . We may stop additional services , background updates or any corrupted windows file .
So ,Let’s begin the task !
- First of all we will start by stopping the Background Intelligent Transfer Service ( BITS ) . It is a service which is used by Windows Update Service to intelligently select and download the updates in the background automatically to make the system up to date .
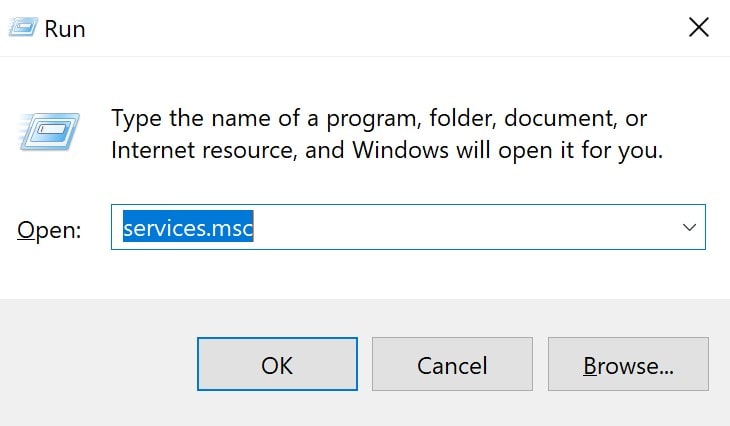
For this open run command and type services.msc
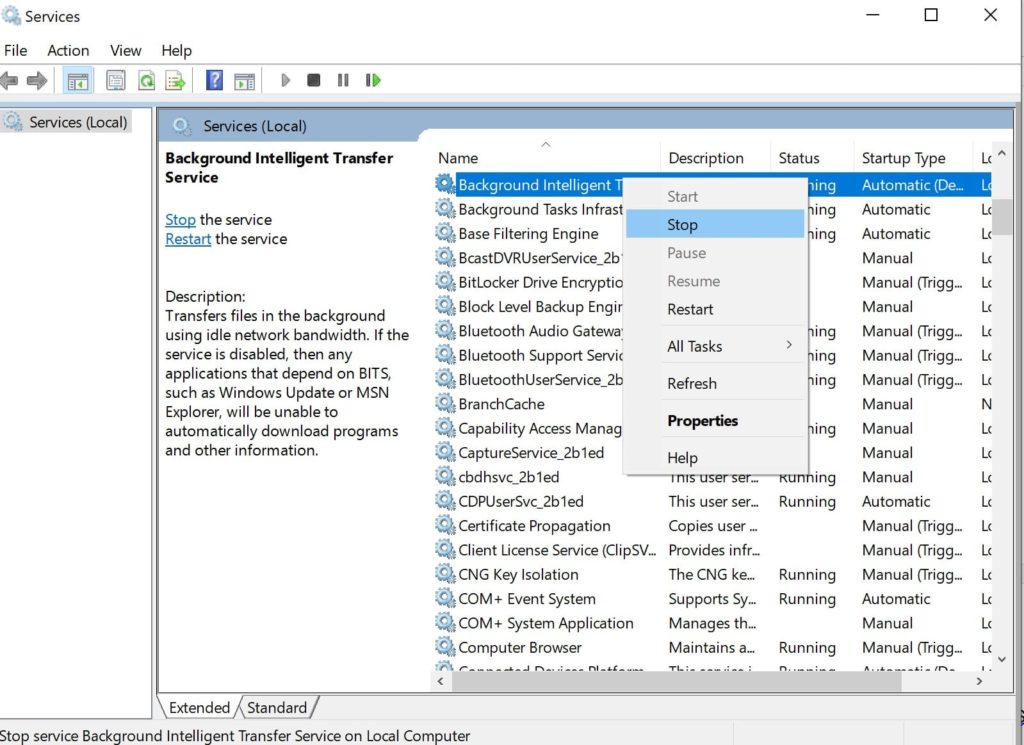
- Search for Background Intelligent Transfer Service ( BITS ) and if it is enabled , disable it by right clicking on the service and selecting stop .
- Next task that we will do is that we will disable a service known as windows remidiation service . This is a service which is usually seen after you update your windows ( windows update package ) or sometimes it can be seen without updating too. This servic remediates the Windows Update Components . Basically, it speeds up the processing of windows update in the background . This service create many .exe and .dll files in the C:\Program Files\rempl . The file names may be as follows:
- sedlauncher.exe
- sedsvc.exe
- reminthndlers.dll and many more
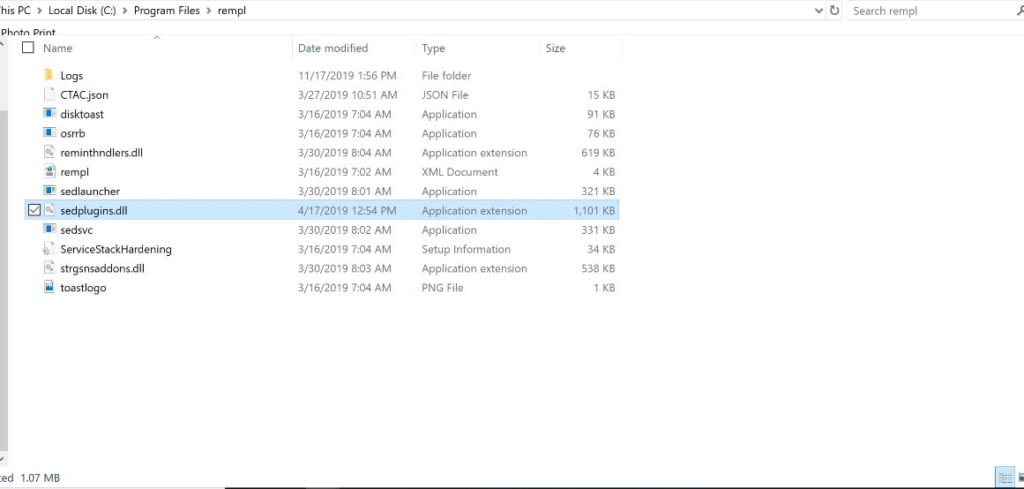
This service creates file that continuously receive updates to improve the quality of features , apps , services and due to this there is high usage of CPU which makes your computer processing slow , so we need to disable this service to prevent the lagging of processes in our system :
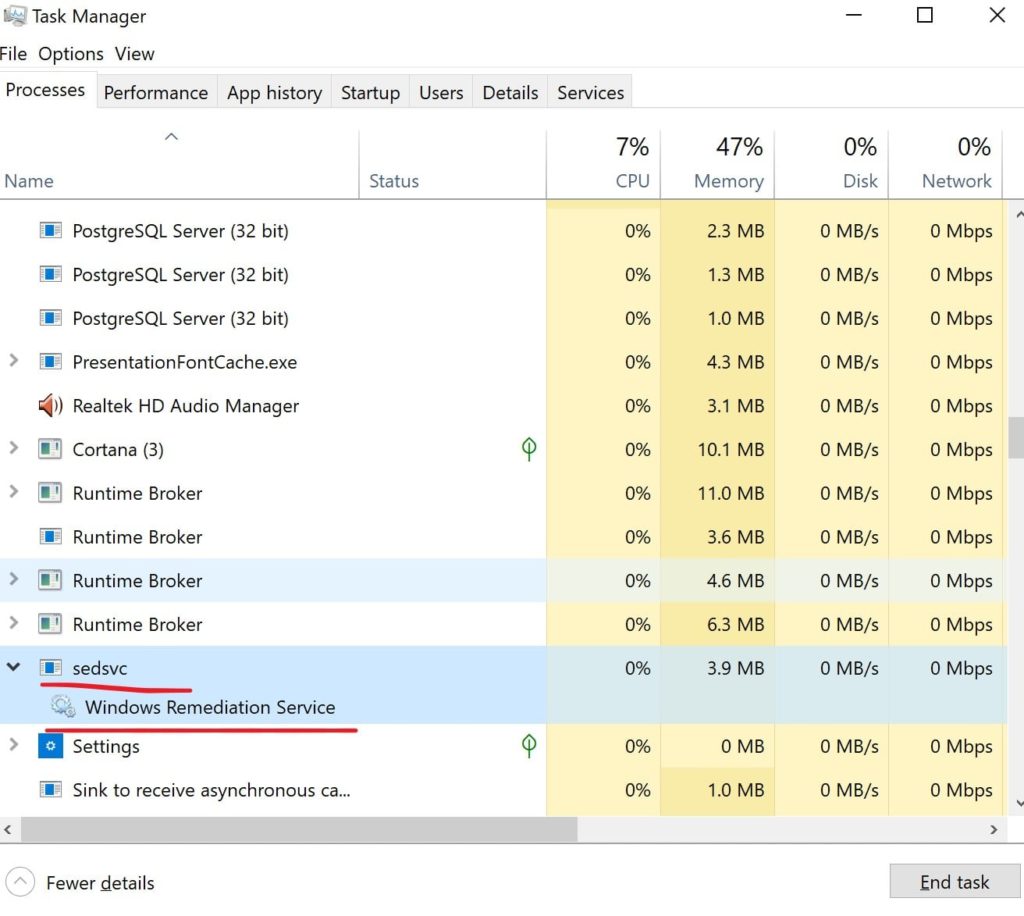
- Open services.msc and search for Windows Remidiation Service and disable this service by right clicking on it .
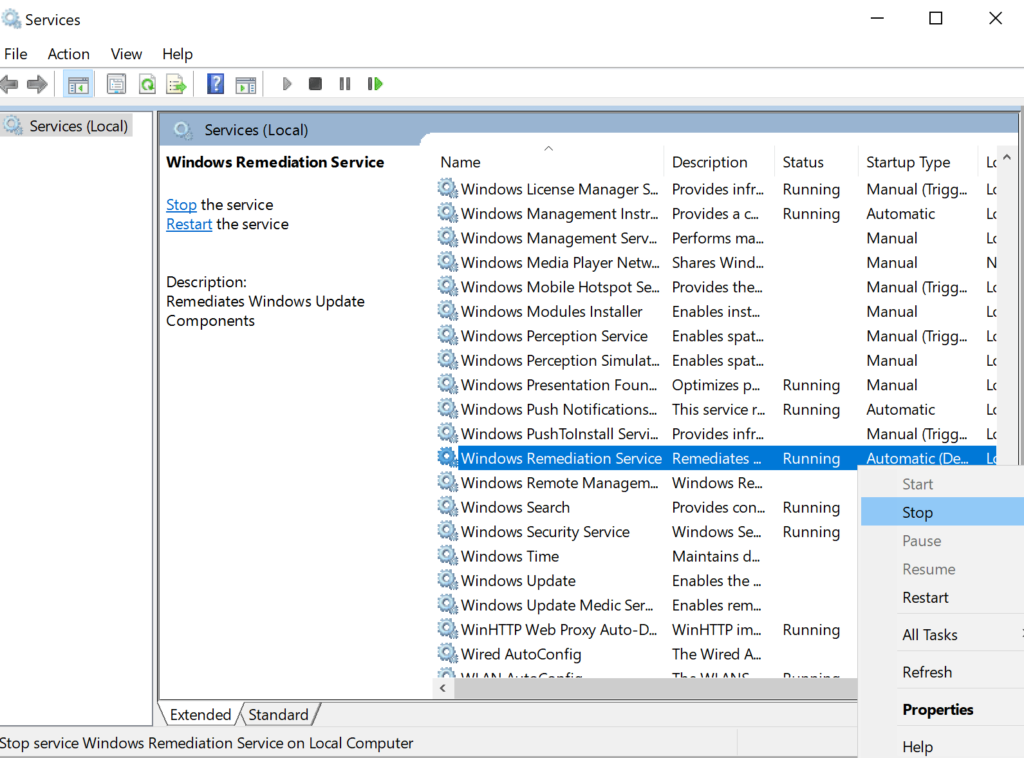
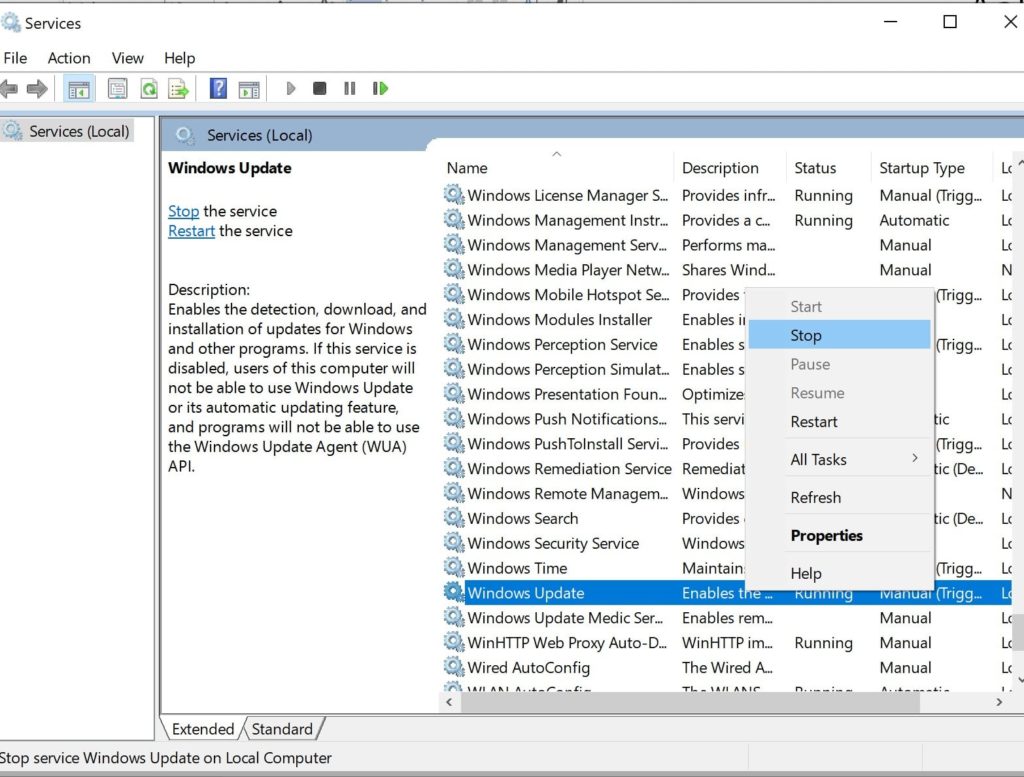
- Afterwards we will disable the Windows Update Service which is used for detecting , installing and downloading the updates for windows and its features or services .
- We will disable this service by staying on the same window i.e services and by searching for Windows Update and disabling this option in the same manner .
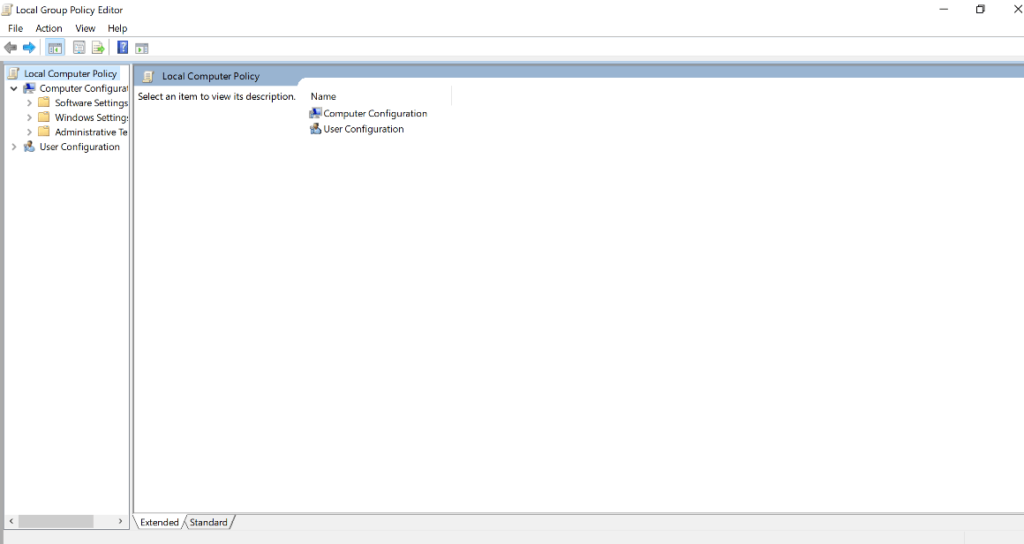
- Now we will edit some of our local group policies to overcome our problem . We will start by opening Local Group Policy Editor .
- Go to Control Panel -> System and Security -> Administrative tools -> Edit Group Policy .
- Now move on to Computer Configuration -> Administrative Templates -> Windows Components -> Windows Update .
- After doing all the above steps , a list of policies related to updating will appear in front of you .
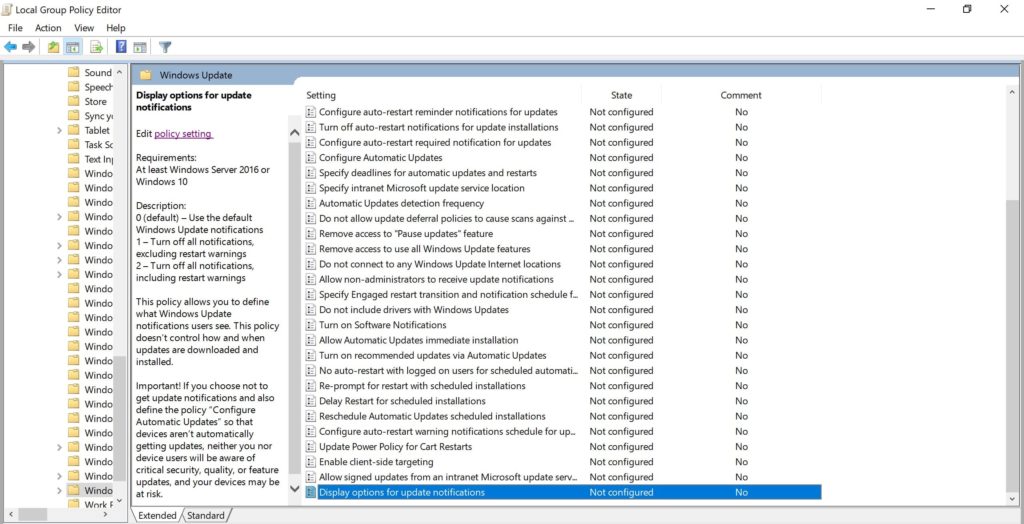
- Now we will edit some of the policies .
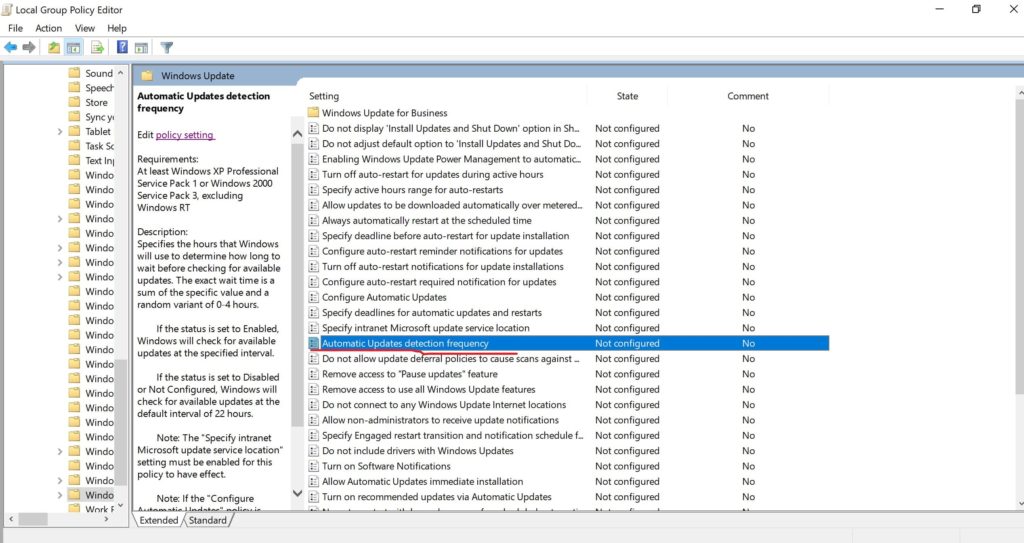
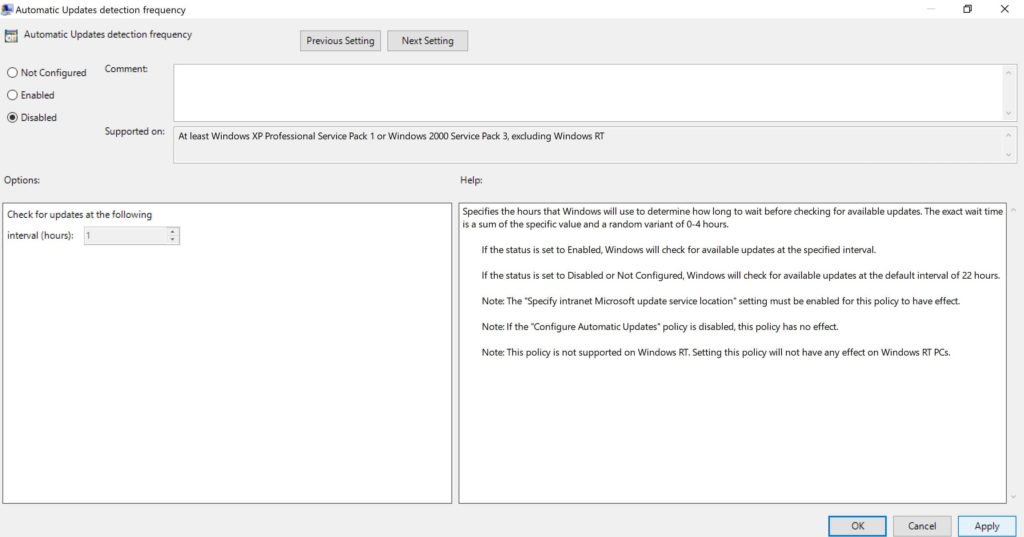
- First we will disable Automatic Updates Detection Frequency by right clicking on it , edit and disabling it and then applying this setting.
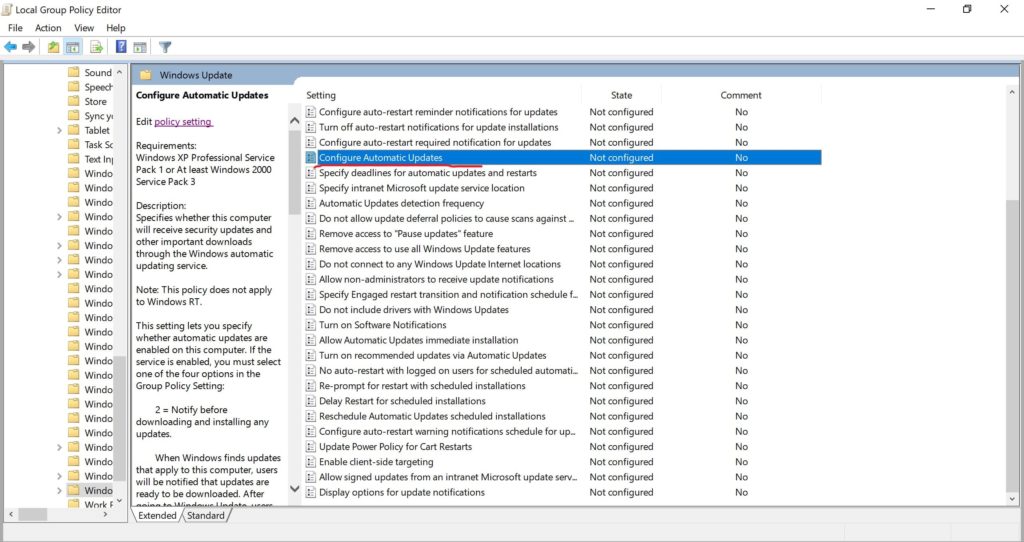
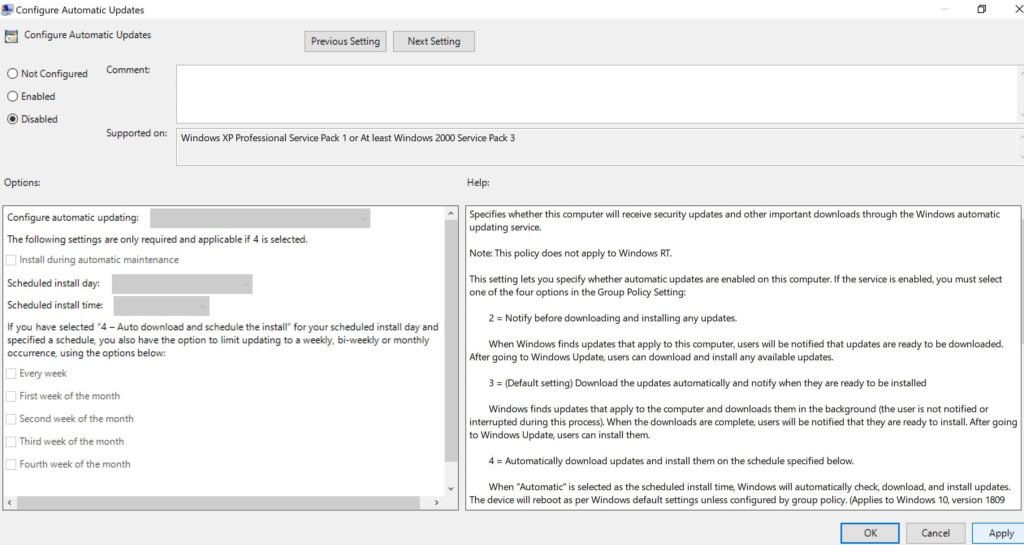
- Next we will disable Configure Automatic Updates
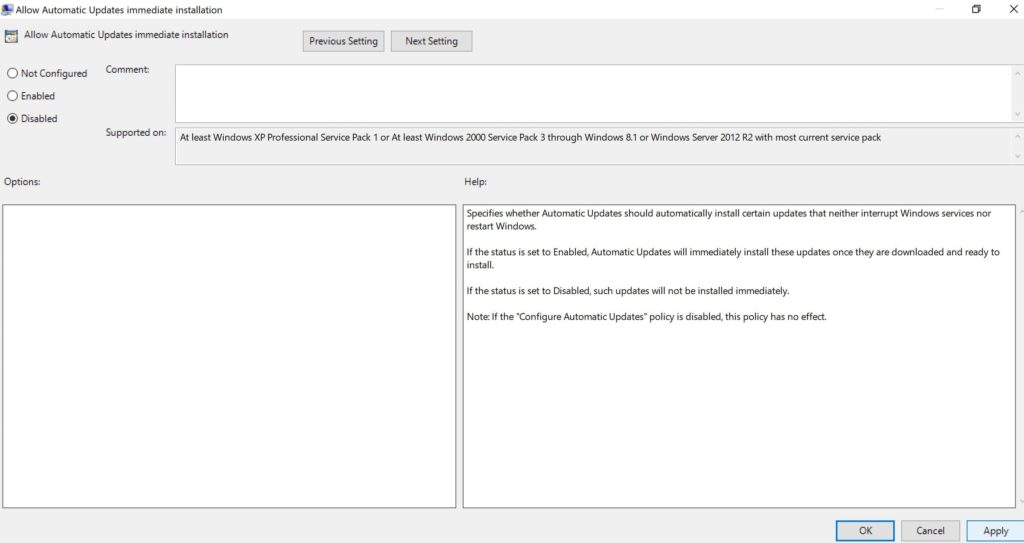
- Next we will disable Allow Automatic Immediate Installation .
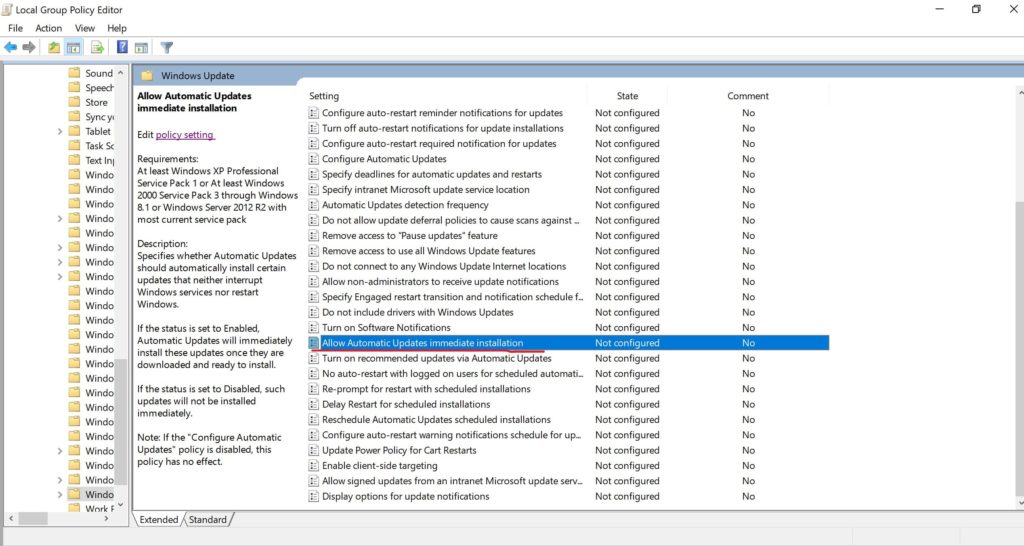
- Next we will disable Allow Automatic Immediate Installation .
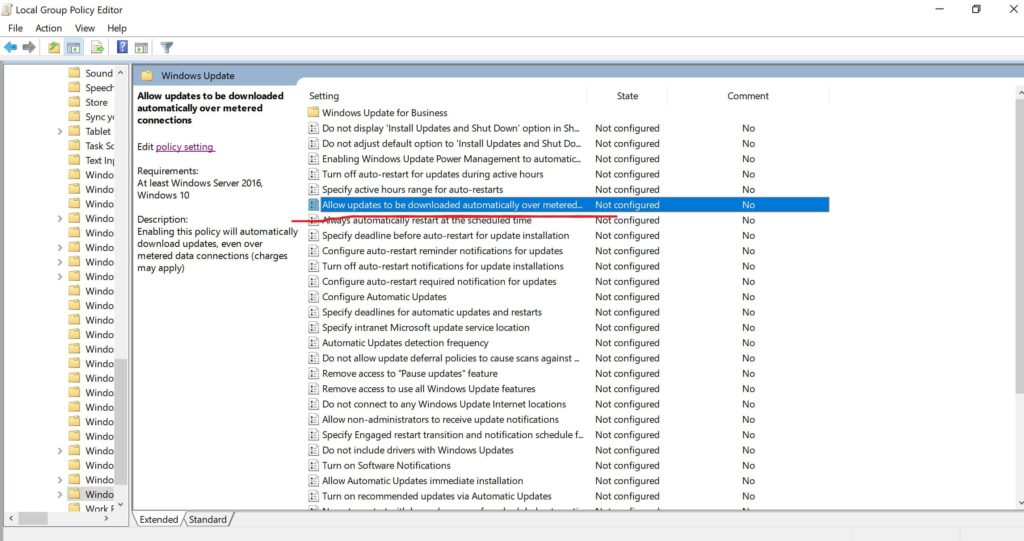
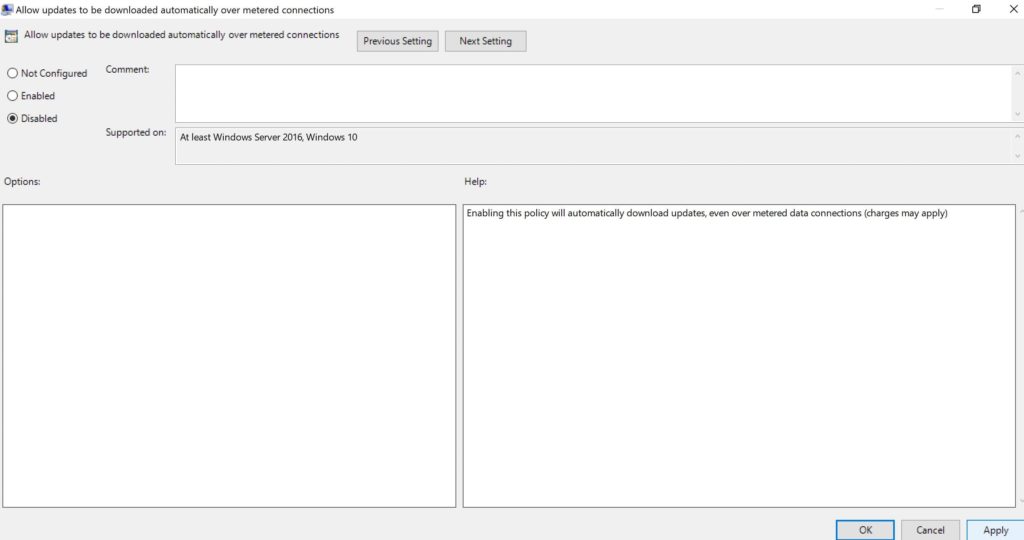
- Next we will disable Updates to be download over metered connections.
- As till now we have edited some of the policies to prevent lagging of our system . You can edit some more policies as per your requirement.


